What the Wood Fence Installation Process Looks Like in Houston
If you’ve never had a fence built before, the wood fence installation process can feel like a mystery. How long will it take? What happens to your yard? Do you need to be home? At Griffin Fence, we install hundreds of wood fences across Houston every year, and we want to walk you through exactly what to expect — from the first phone call to the final picket. Our wood fence installation guide gives you the full picture, and this page digs into the day-by-day process.
- The wood fence installation process typically takes 1–3 days for a standard residential job.
- Steps include property survey, utility marking, post hole digging, setting posts, installing rails, and attaching pickets.
- Houston’s clay soil requires special techniques for post depth and concrete curing.
- Weather and soil conditions affect scheduling and timeline.
Step 1 — Property Survey and Layout
Every wood fence installation starts before a single tool touches the ground. We begin with a thorough property survey to confirm your fence line. This step protects you from two common problems: accidentally building on a neighbor’s property or leaving gaps that create disputes later.
Our team will walk your property line with you, mark corners, and confirm gate locations. If you have a plat or survey document from your home purchase, pull it out — it helps us verify boundaries quickly. We also note any slopes, drainage areas, or existing structures that will affect how the fence is built. This planning phase is part of our installation process and sets the foundation for a smooth job.
For Houston homeowners, it’s also worth checking whether your neighborhood has an HOA with fence height or material restrictions. We can advise you on typical City of Houston requirements, and for formal permit information, you can review the City of Houston fence ordinance.
- Walk the property line with your installer before work begins.
- Have your property survey document ready if available.
- Confirm gate placement and any HOA restrictions in advance.
- Check local permit requirements for your fence height.
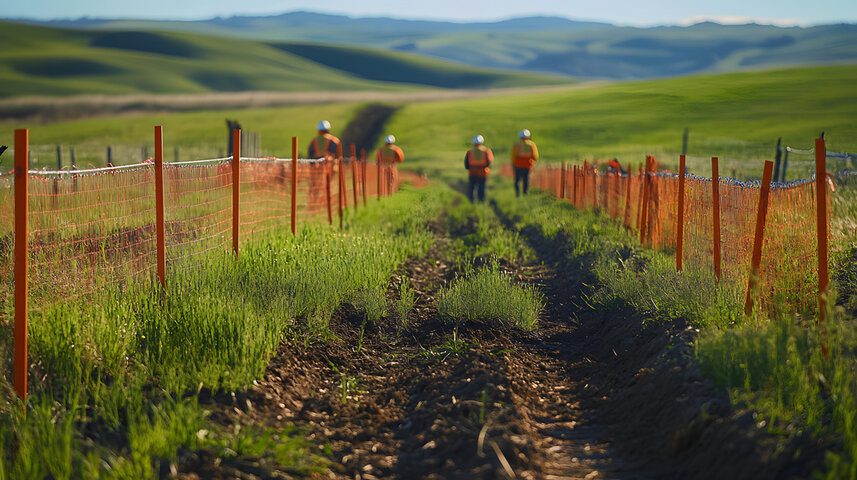
Step 2 — Calling 811 and Marking Underground Utilities
Before any digging starts, Texas law requires contractors to contact 811 — the free utility notification service — at least 48 hours before breaking ground. This is a non-negotiable step in the wood fence installation process, and we handle it on your behalf as standard practice.
When you or your contractor contacts Texas 811, utility companies are dispatched to mark the locations of underground gas lines, water mains, electrical conduits, and telecommunications cables on your property. These markings appear as color-coded paint or flags directly on the ground. Digging without this step can result in dangerous utility strikes, costly repairs, and legal liability.
In Houston, it’s common to find irrigation lines, buried electrical for outdoor lighting, and even old drain tile that isn’t on any official map. Our crews are trained to watch for these and to hand-dig around any marked utility within the safe zone. It adds a little time, but it’s the right way to do the job.
- Call 811 at least 48 hours before digging — we handle this for you.
- Color-coded flags or paint marks will appear along your fence line.
- Hand-digging is required within 18–24 inches of any marked utility.
- Never skip this step — utility strikes are dangerous and expensive.
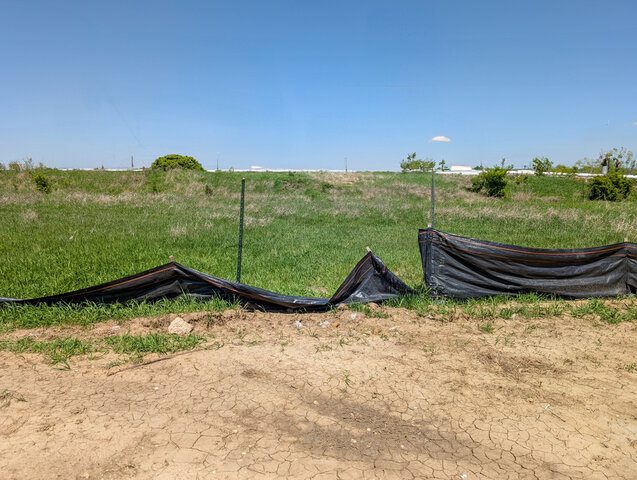
Step 3 — Digging Post Holes in Houston Clay Soil
This is where the real work begins. Post holes are the foundation of your fence, and in Houston, digging them correctly is more challenging than in many other parts of Texas. Our region sits on expansive clay soil — sometimes called “Houston gumbo” — that swells when wet and shrinks when dry. This movement can push fence posts out of alignment or cause them to heave over time if holes aren’t dug deep enough.
For a standard 6-foot privacy fence in Houston, we dig post holes 36 to 42 inches deep. That depth keeps the base of each post below the zone of maximum clay movement. We use a truck-mounted auger for most jobs, which punches through compacted clay cleanly and consistently. For tight areas near structures or utilities, we switch to a hand-operated power auger or manual digging bars.
Post hole diameter matters too. A 4×4 post typically gets a 10-inch diameter hole; a 4×6 or steel post gets a 12-inch hole. The extra concrete around the post locks it in place against Houston’s soil pressure. If you’re considering a more durable option, our wood fences with steel posts offer added resistance to soil movement without sacrificing the look of a wood fence.
- Houston clay soil requires post holes 36–42 inches deep.
- Truck-mounted augers are used for most holes; hand tools for tight spots.
- Wider holes allow more concrete to anchor each post against soil movement.
- Steel posts are an upgrade option for maximum long-term stability.
Step 4 — Setting Posts in Concrete
With holes dug, we set the posts before any concrete is poured. Each post is positioned at the correct height, checked for plumb (perfectly vertical) in two directions using a level, and braced temporarily while concrete is mixed and poured. This step requires patience — a post that’s off by just one degree will compound as rails and pickets are installed, and a leaning fence is obvious to the eye.
We use a dry-mix concrete method for most Houston installations: bags of concrete mix are poured dry into the hole around the post, then water is added. This approach cures faster than pre-mixed wet concrete and is easier to control in humid conditions. Concrete typically takes 24–48 hours to reach working strength, though full cure takes about a week.
Houston’s heat and humidity affect curing time. During summer months, we wet-cure the concrete by adding water over the top and covering it to slow drying, which produces a stronger final result. During the cooler winter months, we may use fast-setting concrete formulations to stay on schedule.
- Each post is leveled and braced before concrete is poured.
- Dry-mix concrete is poured in layers and activated with water.
- Working concrete strength is reached in 24–48 hours.
- Summer heat and winter cold both require adjusted curing techniques.
Step 5 — Installing Rails
Once posts are set and concrete has cured sufficiently, we install the horizontal fence rails. A standard 6-foot privacy fence uses three rails: one near the top, one at mid-height, and one near the bottom. These rails carry the weight of the pickets and give the fence its structural backbone.
Rails are typically 2×4 pressure-treated lumber, set either flat (face-nailed to posts) or on edge (notched or bracketed into posts). The on-edge method is stronger but more labor-intensive. For our board-on-board fencing style, rails are set on edge to handle the heavier picket load that comes from overlapping boards.
Rail spacing is measured precisely at each bay (the span between two posts). Posts are rarely perfectly uniform after setting in clay soil, so every bay may differ by an inch or two. Our crews measure and mark each rail individually rather than assuming uniform spacing — this is one of those details that separates a quality installation from a rushed one.
- Three rails are standard for a 6-foot privacy fence.
- Rails are 2×4 pressure-treated lumber, face-nailed or notched in.
- Rail spacing is measured individually per bay, not assumed to be uniform.
- Board-on-board styles use on-edge rails for extra strength.
Step 6 — Attaching Pickets and Finishing Details
With posts and rails in place, the visible part of the fence finally comes together. Pickets — the vertical boards you see from the street — are nailed or screwed to the rails one at a time. We use hot-dipped galvanized or stainless-steel fasteners to prevent rust staining on the wood, which is a real concern in Houston’s humid climate.
Picket spacing is set using a spacer block for consistency. For a solid privacy fence, pickets are butted tight with zero gap. For a semi-privacy style, we use a small spacer (usually ½ to ¾ inch) between boards. Consistent spacing matters — uneven gaps are noticeable and affect curb appeal. For a full look at completed projects, browse our project gallery.
After pickets are attached, we install gate frames and hardware, set post caps, and do a final walk-through with you to confirm everything meets your expectations. Any overgrown brush or debris from the installation is cleared from the work area before we leave.
- Galvanized or stainless fasteners prevent rust staining on wood.
- Spacer blocks ensure consistent picket gaps across the entire fence run.
- Gates are hung and hardware is adjusted as a final step.
- We do a final walk-through before calling the job complete.
Timeline — How Long Does Wood Fence Installation Take?
For most Houston residential projects, the wood fence installation process takes 1 to 3 days. Here’s how that typically breaks down:
Day 1: Utility mark-out has already been completed (48+ hours prior). The crew arrives, finalizes the layout, digs post holes, and sets posts in concrete. For larger jobs, some post-setting may run into the morning of Day 2.
Day 2: After concrete has cured overnight, rails are installed and picket work begins. Most standard jobs are complete by end of Day 2. Gate installation and cleanup happen on this day as well.
Day 3: For longer fence runs (300+ linear feet), complex gate configurations, or jobs paused by weather, Day 3 is used to finish remaining sections and complete the final walk-through.
To get a timeline estimate for your specific project, use our fence estimator or call for a free consultation. For comparison on larger projects, review our full wood fence installation service details.
- Most residential jobs finish in 1–2 days.
- Larger or complex jobs may run to 3 days.
- Concrete cure time is the main scheduling factor between Day 1 and Day 2 work.
- Weather delays are handled by rescheduling affected days, not rushing work.
Houston Weather and Soil — How They Affect Your Project
Houston’s climate creates specific challenges that every local fence installer must plan around. We build hundreds of fences in this region annually, so these aren’t surprises to us — but they’re worth knowing about as a homeowner.
Clay soil expansion: After heavy rain, Houston’s clay swells and can close post holes within hours. We schedule hole-digging and post-setting on the same day for this reason. If rain delays post-setting after holes are dug, we may need to re-drill some holes before continuing.
Summer heat: Temperatures above 95°F in summer affect concrete curing and crew safety. We typically start work at 7 a.m. during peak summer months to complete the most labor-intensive tasks before midday heat.
Hurricane season (June–November): We may delay scheduling during active weather events. Newly set posts are particularly vulnerable before concrete fully cures, so we avoid leaving posts partially set when a storm is forecast.
Winter cold snaps: While rare, near-freezing temperatures slow concrete cure time. We use fast-setting concrete in these conditions to maintain our schedule.
- Houston clay can close post holes quickly after rain — holes and posts are set the same day.
- Summer jobs start early to avoid peak afternoon heat.
- Hurricane season may delay outdoor work during active weather events.
- Winter cold snaps require fast-setting concrete formulations.
Frequently Asked Questions
Do I need a permit to install a wood fence in Houston?
Most residential wood fences in Houston do not require a building permit, provided they fall within standard height limits (typically 8 feet or less). However, fences built within flood plains, on corner lots, or in certain deed-restricted communities may have additional requirements. We recommend checking with your HOA and the City of Houston’s planning department before installation. We can advise you based on your specific address and project scope during your free estimate.
Can I stay home during the fence installation?
You don’t have to be home during the installation, but we do recommend being available on Day 1 when we confirm the fence layout and gate placement. These decisions are easier with you present. For the remaining work, our crew operates independently. We communicate through phone or text if questions come up, and we complete a final walk-through at the end of the job — that’s when we want you to take a good look at everything.
How soon can I use my fence after installation?
Your fence is structurally usable as soon as the job is complete. Posts set in concrete reach working strength within 24–48 hours, but full concrete cure takes about 7 days. We ask that you avoid leaning heavy objects against posts, hanging gates repeatedly, or applying significant lateral force during the first week. Normal foot traffic through gates is fine immediately.
What happens if it rains during my installation?
Light rain during picket installation is generally not a problem. However, heavy rain while post holes are open or while concrete is curing can cause delays. In these cases, we pause work and reschedule rather than rushing through conditions that would compromise quality. We communicate proactively about weather impacts and work to get your project back on the calendar as quickly as possible.
Ready to get started? Call Griffin Fence today at (713) 937-6611 or contact us online for a free estimate.